Sunday, December 21, 2008

Christmas Plum Cakes.....A cookbook for Jenn


A Peace Offering........

Normally, I would be apologizing at this point. No posts or recipes for an entire month!

You're thinking..."Isn't this one of the busiest seasons for celebrations and food fanatics everywhere?"

Yes, it is.

AND the marvelous part is...this slacker, none-recipe-posting,local-food-pushing-chef, has been so busy during this economically stressed season, I have not had time to unpack my knife roll.

Great things are happening, which all boils down to: I am one lucky cook...

Jenn (and Dave) you won Martha Stewart's "Cooking School"!  I realize you both are great cooks but maybe it might come in handy. Congratulations!

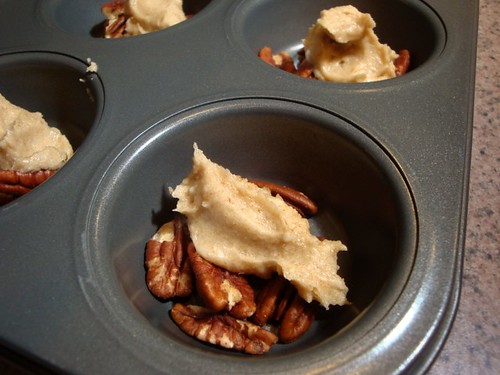
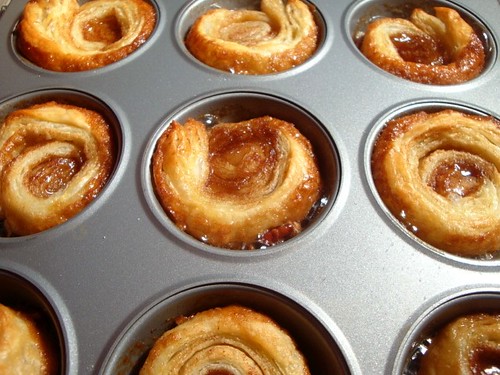
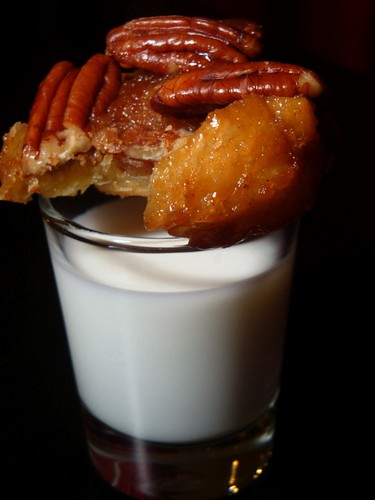
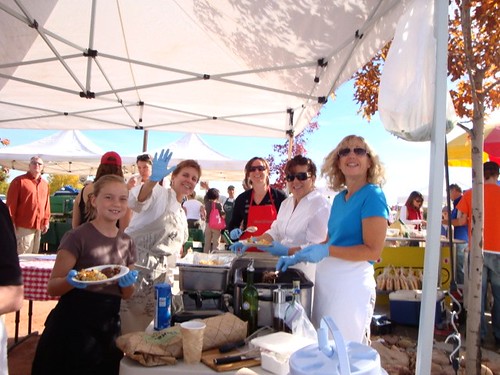
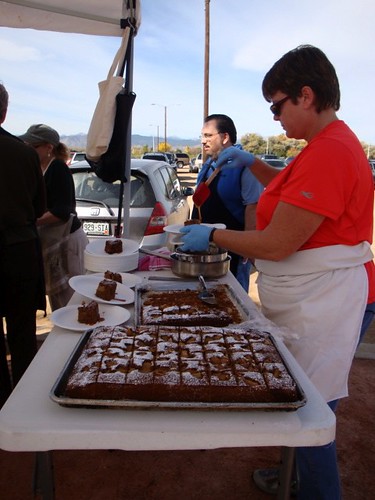
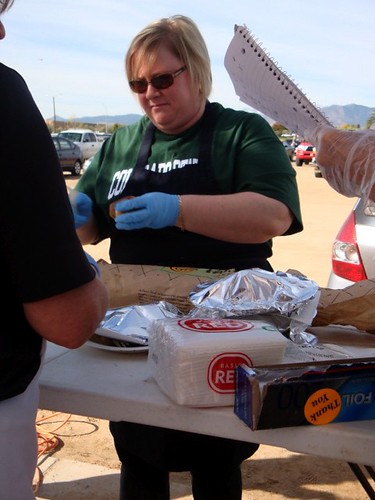
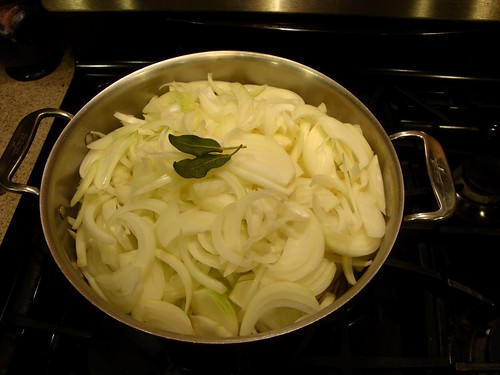
(My camera is MIA, these photos were taken with my IPhone)
IMG_0142


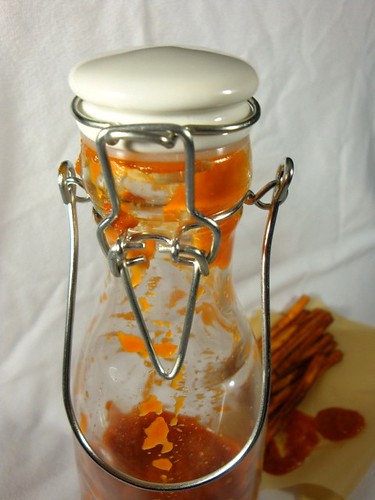
Over the summer, many of you may recall, I encouraged you to buy cases of plums at the end of the season to freeze and/or preserve in Vodka. I recall several of my weekly visitors took me up on the "preserved plums in Vodka" idea, (a handful of you had no interest in the fruit, but boy did your eyes light up about the Vodka!). This recipe is for you.
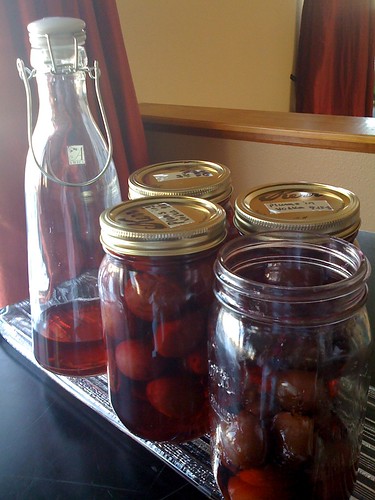
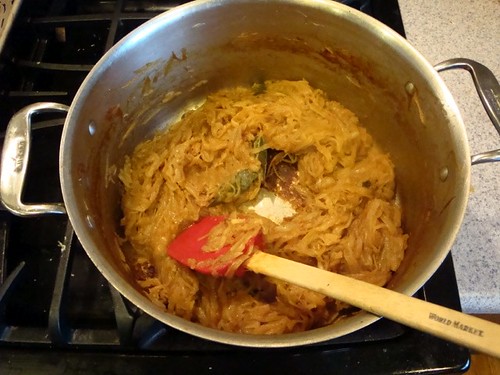
IMG_0144

Christmas Plum Cakes
1 cup, plus 1 TBL flour
1/4 cup white cornmeal
1/4 tsp. salt
1 tsp. baking powder
14 TBL unsalted butter, room temp
3/4 cup, plus 2 TBL sugar
3 large eggs, room temp
10-12 preserved plums, pitted and chopped
2 TBL plum Vodka
1 tsp. Vanilla
Powder sugar for dusting
*Plum Vodka soaking syrup (optional), recipe follows

Preheat oven to 350 degrees.

Butter and flour (2) 3 cup ring molds (European round molds) or 1 bundt pan; or 6 mini bundt pans; or (12) 1/2 cup muffin tins.

Combine Flour, cornmeal, salt, and baking soda and set aside

Beat butter with a mixer until the butter is light and fluffy. Add sugar, and beat for an additional 4-5 minutes. Add eggs, one at a time, and mix until each one is completely incorporated.  Add plum vodka and vanilla

Next, add the dry ingredients to the batter; the mixture will be thick. Finally, STIR in chopped plums. Distribute batter into prepared pan(s) and place on the middle rack of oven.

Bake the cakes until they are brown and a toothpick inserted into each, comes out clean.  *Optional:  When  cake is still hot, drizzle half of the syrup over tops of cakes. Cool for 5 minutes, then invert cake onto a cooling rack and drizzle remaining syrup over each cake.

Once cooled, dust with powder sugar and wrap cakes tightly with plastic wrap.

Cooking times:
Muffin tin: 18-22 minutes
mini Bundt pans: 26-30 minutes
(2) 3-cup ring molds : 45-50 minutes
1 Bundt pan: 45-60 minutes (depending on pan and oven)

*Plum Vodka Soaking Syrup

1/4 cup sugar
1/4 cup plum vodka
or 
1/2 cup sugar
1/2 cup vodka (for really boozy cakes)

Combine sugar and vodka in a small sauce pan over medium heat (caution: do not turn on gas burners until you have combined the alcohol and sugar).  Heat gently until the sugar is completely dissolved. Continue to heat syrup for an additional 2 minutes, remove from heat and set aside for later use.

CHEF'S NOTES:  **This cake has a coarse texture and is rather mild in flavor (unless you opt for the 'boozy' addition). Personally, with all the holiday's over-the-top sweets, this little cake is a nice reprieve.  I like this at tea time. 
**The plum vodka can be used in Martini's or as an addition to sangria ( I am thinking, New Years Day Brunch!?).

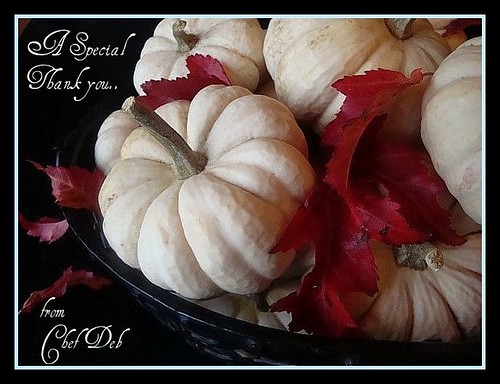
To my family and Friends, Merry Christmas.
To everyone else, Happy Holidays!

Chef Deb T.


Monday, December 1, 2008

Holiday Culinary Disasters....yes, there is an "s" to this story

It happens to all of us.

I hope you will find as much humor in today's post, as I am sure I will, in about a decade or two.

Culinary Disaster Story #1, Same song, second verse......

For the last two years, I have had the privilege of being the Chef at a very large Bison Ranch located on the Wyoming/Colorado border. Each year I am asked to cook for various groups of clients and friends, board retreats, executive team meetings, and the family's very large Thanksgiving celebration. I find great pride in being called "The Ranch Chef".

Thanksgiving 2007: Nervous and wanting everything to be perfect, I follow Mr. and Mrs.'s instructions to the letter. My sous chef and I cook breakfast, lunch and dinner for 22 people for 5 days. Thanksgiving turkey's are ordered, brined, basted, cooked, rotated and pampered for HOURS. Dinner time was promptly at 5:00. BOTH birds were gorgeous on the outside, and the inside temp readings registered a perfect 160 (we left time for carry over cooking)....but, to my horror, both birds were completely undercooked on their left sides!! I prayed Mr. and Mrs. did not want to carve at the table....they didn't. We carved up the right sides only and spent the next 20 minutes frantically cooking the left sides of the birds before the family came back for seconds. It was a close call, but I learned my lesson. The Ranch is at an elevation of 9000 ft....next time, I would allow for longer cooking time and bring better thermometers.

Thanksgiving 2008: I am prepared this year!
On the Tuesday before Thanksgiving we had determined the Ranch's commercial ovens were not running true and at any given time, they would drop 25 to 75 degrees. If I opened the doors, they would loose all heat. I was thrilled, because I now knew that it was not MY fault last years turkeys only cooked on one side. It was too late to have the ovens serviced, so we lined the ovens with fire bricks and I was confidently on my way.......

Thanksgiving day and I am ready to do battle... I bought three medium turkeys instead of two large ones. I had the oven heating for 2 hours so the bricks were evenly hot. We even had so many meat thermometers inserted into the birds, it looked like the turkeys were visiting an acupuncturist! We brined, basted, cooked, rotated and pampered for HOURS. These turkeys were gorgeous! Every thermometer said we were right on target. At 5:00 o'clock sharp, I carved the turkeys, and all three birds are undercooked on the LEFT SIDE!! Thank Goodness I was cooking for Bison Ranchers and not Turkey farmers or everyone would have noticed just the right sides of the bird. At the end of the evening, I confessed, everyone laughed, and we all poked fun at my turkey cooking skills. I despise turkey.....

Culinary Disaster #2 This was a Woozy..I mean doozy.

48 hours later.....Ranch Christmas party and 45 guests are arriving at 5:30. I have cooked 35 lbs. of Buffalo Short ribs, ( seared then braised at 200 degrees, overnight) and 30 lbs of dry aged Buffalo Prime Rib ( I dry aged the meat myself). Everything was perfect!!! Cocktails and appetizers are served, several jokes about turkey circulated and I could laugh about Thanksgiving because I am an expert at cooking Buffalo. Tonight was my night!

We set up the food buffet style, I explained the menu to the guests... I am proudly standing over our perfectly braised, fork tender short ribs, and one of the slabs of perfectly rare Buffalo prime rib ( the other two are in the oven, waiting to be pulled out, rested, then carved). As I am helping two small children with their plates and food selection, I look over to my right and notice, what can only be described as "Tomato Sauce" thrown all over our 45 dinner plates, salad, dressing and some of THE PERFECT PRIME RIB. Susan, the saint who washed all our dishes and who set the tables, discreetly tried to tell me what had just happened.

Everything was in slow motion......an Eleven year old boy stood in front of her and told his father he did not feel well and proceeded to empty the contents of his stomach all over the buffet that was going to feed the remaining 42 guests. He did not even cover his mouth or turn his head... he just decorated the table.

In shock ( they said my eyes rolled to the back of my head), a handful of us removed the linens, the food, and SAINT Susan cleaned and disinfected 43 plates. We passed out more wine and appetizers, then pull together the second round of clean, fresh food and to my horror...the two, almost WELL DONE slabs of prime rib.

Where was the undercooked Turkey when I needed it?

Mrs. told me not to worry, no one would notice and everything would be fine. Ninety percent of the guests had no idea about the "Hurl fest" that took place 30 minutes before. BUT I will tell you, EVERY ONE of those ranchers and ranch hands let me know that I overcooked the Buffalo!

I am told, someday this WILL be FUNNY.

Why am I telling you this? Because we all have kitchen disasters and I am looking for a little holiday chuckle. If you are willing to share your own holiday disaster, I will put you in the drawing for the last book I am giving away, Mark Bittman's "How to cook everything" .

It has almost everything in it, except how to cook turkey at 9000 feet and the proper technic for shielding buffet food from an 11 year old...

I hope your Thanksgiving was happy and memorable too!

Chef Deb

Sunday, November 16, 2008

Easy Sticky Buns/Cookies

One of the things I am completely sure about is... I make pretty darn good pecan sticky rolls. I always use an incredibly rich Brioche dough and it usually takes about two days to make them. Also, I have acquired a bit of a cult following for these rolls during the Holidays. Let's just say, I know a thing or two about sticky buns.

DSC00647

So, I was a bit skeptical when I ran across Ina Garten's recipe for "easy" sticky buns. Surely, if they are easy, they can't be good, right? She says you can throw together this recipe in 10 minutes..10 MINUTES?

Really?

C'est impossible! (Suddenly, I am feeling very French) This is impossible!

Somewhere in the instructions, it MUST mention the other 47 hours and 50 minutes..

It doesn't.

I decided to test the recipe and see just how good they REALLY are....I did this for you, dear reader.

Note: Due to copyright restrictions, I cannot post this recipe without permission, therefore I provided the link above in the title and I will offer again at the end of this post.

DSC00619

DSC00621

DSC00630

DSC00642

These little beauties are made with puff pastry and really only take about 10-15 minutes to assemble. I ate a few right out of the oven, and they were good (not Brioche dough, good). Actually, they were really good, but the amazing thing about this application of "sticky bun" is how wonderful they are cold. The caramel had time to set and all the flavors evolved into this wonderful cookie/bun thing that I could not stop eating! 

Ina dear, you're an absolute genius!

Mais bien sûr!

bon appétit

Chef Deb

Easy Sticky Buns

Apple and Sweet Potatoes w/Cider Maple Glaze

In my attempt to replace the dreaded "Orange Marshmallow Stuff" on our Thanksgiving table, I somehow stumbled across this recipe and convinced my mom to let me make this instead. This recipe was one of my mom's favorites, so it holds very special memories for me. I haven't made it in quite a while, but it's time I dust the recipe off and maybe it will find a new home.


DSC00616

Sometimes I add cinnamon, and I also use different apples depending on the flavor combination I am looking for. The recipe calls for Granny Smith apples for tartness, but in this photo I used our local Honey Crisps and it was delicious!


DSC00612


I was a bit lazy and did not peel my apples and they turned a nice dark color, which I like. You can avoid this by peeling your apples or leaving the foil on longer or baking the last 20 minutes at a lower temperature.

DSC00628

Apple and Sweet Potatoes w/Cider Maple Glaze

4 tablespoons unsalted butter
6 sweet potatoes (4 1/2 pounds), peeled and sliced 1/4-inch thick
6 large Granny Smith** apples (3 pounds)--peeled, cored, and sliced 1/4- inch thick
1 cup pure maple syrup ( more if you like it sweet)
1 1/2 cups apple cider
1 stick (4 ounces) unsalted butter
1 teaspoon salt

Preheat the oven to 350°. Grease 2 very large, shallow baking dishes using 2
tablespoons of the butter. Alternating the sweet potato and apple slices,
arrange the slices in the baking dishes in a single layer of concentric circles.

2. In a medium saucepan, combine the maple syrup, cider, butter, and salt. Simmer over moderate heat for 5 minutes. Pour half of the mixture over the slices in each of the baking dishes and cover the dishes securely with foil.

Bake in the center of the oven for 50 minutes. Remove the dishes from the oven, uncover and baste the apples and sweet potatoes with the pan juices. Increase the oven temperature to 450° and place the dishes in the upper third of the oven. Continue baking for about 25 minutes
longer, basting a few more times, until the sweet potatoes are tender and nicely glazed. Serve hot.
**I use Honey Crisp or any crisp sweet apple, or a mixture of your favorite apples.

MAKE AHEAD
The recipe can be prepared up to 1 day in advance and refrigerated. Reheat,
covered, in a 400° oven for 25 minutes.

Enjoy,

Chef Deb

Saturday, November 15, 2008

Oven Roasted Sweet Potatoes w/Browned Butter and Fried Sage

As a child growing up in Texas, I was never really fond of my families version of sweet potatoes. Someone would open a can or two of  "yams" and mash them slightly, pile on the brown sugar and marshmallows and bake it until there was little life left.  Now, there really is nothing wrong with this version of a very popular southern side dish. In fact, one southern Food Network star showcases this dish every year and people rave about it. You either LOVE the dish or you don't. Personally, I will pick salty-savory over sweet-savory every time!
 
Last year, my pastry chef and I were cooking at a ranch in Wyoming and for Thanksgiving we created this dish ( I am sure it was more of Teresa's idea).  I say we created it, because I have looked for it on the Internet and so far, I have not seen this particular application.

Normally, we just arrange a pile of these beauties in a huge bowl and garnish, garnish, garnish. But for the sake of this post, I had to add a bit of color to make the photo visually stand out. Try to use several different shades of sweet potatoes, it is more interesting and your guests can choose their favorites.

DSC00599

This dish is really simple and it utilizes an ingredient many of you will see over and over again in my cooking; Browned Butter or Beurre noisette. When you are warming the butter and the milk solids drop and begin to brown, you will notice this warm, nutty butter smell slowly emerging from your pan. THAT little bit of toasty goodness is all you need to take an average dish over the top, to completely divine.  I use this trick in sauces, pound cakes, shortbread cookies, soups or over plain sweet potatoes, as we will be doing today.  This is what you are looking for:

DSC00602


Oven Roasted Sweet Potatoes w/Browned Butter and Fried Sage Leaves

4-5 lbs. Sweet Potatoes/Yams
1/2-3/4 cup unsalted butter
15-20 sage leaves
Sea or Kosher salt
Fresh Ground black pepper

Preheat oven to 350 degrees

Scrub sweet potatoes and pierce each twice (2 x) on the TOP (if you have holes facing down the sugar will seep out onto your oven floor).  Place each potato directly onto your oven racks and keep them at least an inch apart. Bake for 30-45 minutes or until a sharp knife inserts easily. Some of your potatoes will cook more quickly then others, so check the smaller ones first and remove them when they are done.

While the potatoes are in the oven, heat a small saucepan on medium low heat and add butter. Butter will melt, the milk solids will rise to the top, and when they begin to drop back down, there will be some splattering, so be careful.  After 5 minutes or so you will notice the milk solids will begin to brown.  At this time, toss in your sage leaves and "fry" for 1-2 minutes. Remove sage leaves from butter and drain on paper towels.  Reserve for garnish.

Keep on eye on your butter, as it browns it should have a "nutty" smell. Once it begins to darken, carefully transfer the butter to another heat resistant dish. This stops the cooking process and keeps the butter from burning.  You are more then welcome to strain the butter to remove the dark bits, but why make more work for yourself.  You can either skim the clear brown liquid from the top or you can just include those little tasty bits in your dish.  

To Serve: Carefully cut roasted potatoes into quarters, arrange on your serving dish and spoon browned butter over all the pieces, liberally salt and pepper, then scatter whole or crushed sage leaves on top.

**Note: dried sage will not work in this dish, nor will thyme leaves.  I find rosemary is a bit too overpowering as well.  Try to use fresh Sage leaves, you will find it in abundance this time of year and it really makes this dish perfect. Once the sage is fried the flavor becomes really delicate, and nice. 

Enjoy,

Chef Deb

P.S.  Thank you Aunt Judy , for reminding me of this dish.  I'd like to know which recipe was more popular in Virginia, this one or the Sweet Potato Apple....


In House Cultured Buttermilk

One of my youngest daughter's favorite weekend morning rituals, is to make buttermilk pancakes.  Like many people, when I do not have time to run to the store and purchase buttermilk, I would do what everyone else does and add lemon juice or vinegar to my milk and call it done. 

In truth, the acid in the lemon juice reacts to the baking soda (baking powder reacts to heat) the way buttermilk is suppose to do, BUT the flavor really misses the mark. A nice fresh buttermilk, is really a thing of beauty, and I wonder why we no longer make or use it. 


DSC00583

 I recently learned how easy it is to make at home, and if you use milk from our very own Longmont Dairy, your fresh buttermilk will last at least 2 weeks before you have to think about using it up.

 Just a quick bit of history before you begin.  There are two types of buttermilk: Traditional or Old Fashioned buttermilk, which is the by product left over from butter production.  My grandmother called this "sweet buttermilk". The second type is called fermented or cultured buttermilk, it is a thicker product and it is produced when good bacteria is introduced and fermentation is allowed.

Cultured buttermilk takes about 12-16 hours to make, but it only takes a minute to assemble, and the rest of the time it just sits on your counter. Yes, it's fine sitting out on your counter. No, you won't die a horrible dairy death. No really, YOU won't be the exception. If you want to know the science behind it all, click on: Cultured Buttermilk.

The site above uses a higher ratio of cultured buttermilk to start his recipe, however I have found you do not need the amount he suggests.

Cultured Buttermilk
1 quart skim milk (I use 1% also)**
3 Tbl store bought cultured buttermilk ( this is your starter, you won't have to buy it again)

Place your milk and buttermilk in a jar with a lid. I use mason jars or the glass jar my milk is delivered in. I then put the jar in a pan with warm water (body temp is fine) to speed up the fermentation  process.  Once the milk has warmed up, I place it on the counter and wait about 12 hours before I check it.  The finished product should coat the class when it is tilted.  You will find the taste mild with a very slight tang.  Once it is thick, store it in the refrigerator.

 Fresh buttermilk can be used in smoothies in place of yogurt or in your favorite buttermilk pancake recipe.  I also use it in mashed sweet and regular potatoes, soups, breads, muffins, cake mixes, etc., etc..

**Every few weeks, remove a few tablespoons of your "old" buttermilk and add it to fresh skim milk, leave it on the counter and you have new cultured buttermilk.  
**If you use heavy whipping cream with the same recipe, you will have a really good version of Creme Fraiche!

Enjoy, 

Chef Deb

P.S. You still have time to buy storage fruits and vegetables from some of your favorite farms. Help these farmers have a good winter, and support your local producers.


Sunday, November 9, 2008

Hanging Tomatoes and House Made Ketchup Diablo

It was a desperate call......I am new at gardening you see, and every call, is a desperate call..

Phone rings at my friend's farm..

Hello?

"Teresa! What do I do?  It's raining AND it's going to freeze tonight and I still have tons of tomatoes...Help!"

"Well, you can pull up the plants and hang them in your garage....."

Huh?

It took a bit more convincing, but I am proud to say I listened.  I won't retell the story of cold rain, no light and my struggle to play tug-of-war with a 30 pound tomato filled plant, whose roots, I can assure you were the size of a tree trunk. Nor will I recount the number of times I pulled so hard, I fell flat on my rear only to find that same darn plant still firmly stationed and obviously mocking me. I will say this, when you are triumphantly hanging said evil tomato plant up in the garage, be certain, CERTAIN to knock off all the dirt from its grotesquely large root ball.  I cannot prove this, but it did not loose a speck of soil until I was hanging it over my head, and I think it did it on purpose....  

I still have tomato plants hanging in my garage, and we are eating ripe tomatoes in November! 


DSC00546
 
 House Made Ketchup:  This recipe can be made with fresh tomatoes or with canned and unlike other Ketchup recipes, I don't want you to strain it, unless you feel like doing more dishes.

I have chosen to make today's recipe on the spicy side.  It has a kick and goes well with sweet potato fries, or as an ingredient in a nice home style meat loaf.

Just for fun I am calling this:

Ketchup Diablo

3-4 lbs. Tomatoes, peeled, and chopped or 2 28 oz cans whole tomatoes
1 large sweet onion, diced
3 cloves garlic, chopped
3 tablespoon olive oil
7-8 chipolte peppers, roughly chopped
2 Tbl ground coriander
1 Tbl smoked paprika, hot or sweet
1/2 tsp ground cloves
1 Tbl kosher salt
1 tsp ground black pepper
1/2 cup cider vinegar
1/3 cup brown sugar or agave nectar 

In a large pot with a lid (or use a screened splatter guard), saute onions and garlic in olive oil, about 5 minutes over medium heat, the onions need to soften just a bit.

In a blender:  add onion/garlic mixture, tomatoes, chipolte peppers, coriander, paprika, cloves, salt, pepper, vinegar and sugar, and puree until smooth (3-4 minutes on high).  You may have to do it in batches.

Return the puree to your large pot, lower heat, cover pan and cook for 30 minutes, stirring occasionally.  At this point check thickness.  If more evaporation is needed, off set the pot's lid to allow steam to escape and check ketchup every 15 minutes until the desire thickness is achieved. 

 I like my ketchup to really coat my fries, so I may let my ketchup reduce up to an hour or more.  Once you reach the desire consistency, taste your ketchup and adjust the seasonings to fit your taste. Does is need more salt? Do you prefer sweeter ketchup? Add more brown sugar or agave nectar.  Need more heat? Add the smokey adobo sauce from the chipolte can.
 
Ketchup can be processed and ladled into cleaned and sterilized mason jars. Once properly processed Ketchup Diablo should keep indefinitely

Enjoy,
Chef Deb

**This week I will focus on:
    ~Thanksgiving recipes
    ~Setting up Cheese Class before the holidays begin
    ~Sending out an updated weekly newsletter with better formatting and more information then past emails.


Monday, November 3, 2008

Jalapeno Cheese Grits

and a cast iron skillet...

DSC00489


Jalapeno Cheese Grits
Serves 4-6 (or one homesick Texan)

4 cups water
1 cup quick Grits (not instant)
3 Tablespoons unsalted butter
4 oz. Extra Sharp Cheddar, or Raw Goat Cheddar
2 small Jalapenos, diced, leave the seeds in  if you can take the heat
1/4 small onion, finely minced
2 cloves garlic, minced
Kosher Salt
Fresh Ground pepper

In a medium sauce pan over medium heat,  saute Jalapeno, onions and garlic in butter for 3-4 minutes. Add water and bring to a boil, slowly whisk in Grits and stir for 5 minutes. Turn down the heat and continue to cook and stir for an additional 7-10 minutes.  Add Cheese and fresh ground pepper, taste and adjust seasonings.  Add a few more pats of butter if you wish or more cheese too.
 
**For creamy Jalapeno Grits, add a few tablespoons of cream with the cheese and serve as is.

**For Baked Jalapeno Grits, add 1 or two beaten eggs once the grits have cooled, pour into a buttered baking dish, top with additional cheese and bake for 30-45 minutes @ 350 degrees

**For Crispy Grits (see photo), Pour grits into a buttered pan and allow to cool in the fridge for several hours or overnight.  Slice Grits into desired shapes and brown on a hot skillet with a dot of butter and a drizzle of olive oil. Do not turn until you see the edges turning brown, even then, wait a bit more..what you are looking for are The Tasty Bits, or a good crust to develop.

Enjoy!
Chef Deb 

Sunday, November 2, 2008

Shiner Bock Garlic Mashed Potatoes

Excuse Me Ma'am, your Texas is showing...... 

DSC00360

I come from a long line of proud Texans. My father's family immigrated to New Braunfels, Texas , from Germany, in 1844. To this day, if I am in the Texas Hill Country you can be sure I will run into a cousin, uncle or aunt.  As big as Texas is, it always feels small to me. You never run into a stranger, and people strike up a conversation for no apparent reason what so ever. 

I am embarrassed to admit this, but I spent most of my life trying to leave Texas.  From the early age of 6, while captivated with Julia Child, and later Jeff Smith's tours of the world of food, I knew I needed to experience more then my home state had to offer. I read books about the world, planned out my education, worked hard to eliminate my accent and rarely used  Texas-isms, such as, " fix'in ta"," gonna", and "cuz". With great difficulty I finally abandoned the last Texan/Southern identifier, the all too familiar, "ya'll".

Sure, I slip a bit when I speak to my 82 year old grandma, 'cuz' her accent is as thick as they come. But all in all, I was always proud when someone mentioned my lack of the typical Texas accent.  That was until this last trip back. 

When Teresa and I were leaving the plane, the flight attendant said, "Bye, Ya'll".

As we walked back into the terminal, the counter attendant said, "bye, you guys".

Quietly behind me, I heard Teresa say, "I liked "Ya'll" better".

 Then it hit me.  

Me too my friend, me too.


DSC00482

Beer and potatoes? You bet!  I remember making these when I worked at the very first Central Market in Austin, Texas.  Shiner Bock is a good German style beer, but you can use our local, Pandora's Bock by Breckenridge Brewery or Yo Han Bock by Dillion Dam Brewery.

                        Shiner Bock Garlic Mashed Potatoes
serves 4-6

2 lb. small-medium Local Red skinned potatoes, washed
8 whole cloves garlic, peeled
1/4 cup unsalted butter
1/4 cup buttermilk, milk, 1/2 & 1/2, or cream
1/2 to 3/4 cup Shiner Bock, or a local Bock Style beer.
Kosher Salt
Fresh ground pepper
melted butter (optional, but use it anyway)

Place potatoes and garlic in a 4 quart pot and cover with cold water. Turn heat to high and boil potatoes for 20-30 minutes, or until a sharp knife inserts very easily.
Drain Potatoes and garlic. While potatoes are still hot mash them using a mixer or potato masher.  Next add butter, buttermilk, 1 teaspoon Kosher salt, Fresh ground pepper and half the beer, mix for about 10-15 seconds (over mixing, makes potatoes "gluey"). Taste and add more beer if you want a richer flavor. Adjust seasonings and drizzle the top with melted butter.

Leftovers can be turned into potato cakes or into a Bock Potato Cheese Soup

Enjoy,
Chef Deb

P.S. I have to get these next two recipes out of my system before I can return to local Colorado Farm to Table recipes: 
*Jalapeno Cheese Grits
*King Ranch Chicken Casserole 


Catching up, Cheese Class...Cookbook Winner!

"Catching up" is the theme for this week.

Missed calls, dozens of emails, appointments to schedule, holiday parties to create menu's for and deadlines for upcoming classes, blah, blah, blah.... But all these take a back seat when someone in the house is not feeling well, and in our case, I have two someones. My daughter's have two unrelated ailments, and I know, as sure as the sun rises, they will eventually swap bugs.

So, while I am jotting down dozens of ideas and recipes to share, I am busy making soothing garlic soup (it's more of a broth, really) for one child. Of course, the other wants chicken noodle soup with extra noodles (but only the special thick chewy ones)..fresh ginger ale, plain baguettes and hand rolled crackers. I always feel helpless when those around me are not well, and I compensate for those feelings by concentrating on special items. I firmly believe in the adage: Food is love (and it keeps me busy).

Cheese Class:
This trip was well worth the time and effort! I met some wonderful people, ate incredible food, explored and shared my home state with my good friend Teresa AND learned a great deal on cheese making. I will share it all later this week.

DSC00430


This was one of our "must stop" places. We actually ate there two days in a row, and traveled over 60 miles to eat there the second day. Monument Cafe. Georgetown, Texas! They support local farmers and producers and are well worth the drive if you happen to find yourself in Austin. Ya'll will thank me later, promise.

Cookbook Winner!

Emily Kintzel has won, BakeWise, by Shirley Corriher. Congratulations!

I had so much fun with this and Thank you to all who responded.

I will not be able to do this every month, but I thought a few more books for November and December would be exciting.

November's book is, Martha Stewart's Cooking School. Drawing ends November 30.

There has been a new genre of cookbook emerging in the last year or so. If you have noticed, many are going "back to basics". It makes sense, with all the news on the economic state of our nation, to go back to simple things. I have always been a bit bothered by cooking classes and books that teach "recipes" as I feel you need to know "Techniques". Martha's new book brings those techniques to you and of course, "It's a good thing". Everyone who sent me an email will still be on the list for this month.  Good luck!

Chef Deb

Wednesday, October 22, 2008

Cheese Classes.......and A Chance to win a great cookbook: BakeWise

On Thursday, I am leaving for Texas to take a two day cheese making course  with my good friend, and Pastry chef, Teresa B.  I have been looking forward to this for months! 
 
Artisan cheese making seems like a natural progression or evolutionary step in my quest,  as I try to create recipes using only local, seasonally available produce and products. If you factor in the Food Nerd element and my obsessive quest to "just know MORE", I could not pass up this opportunity.    I am fortunate to have milk delivered to our home in glass bottles each week (Longmont Dairy), and now I have access to raw cow's milk AND raw goat's milk.  As many of you know, I already encourage you to make your own fresh ricotta cheese.  It is very easy, and there really is nothing else that compares to it. By taking this course, I hope to bring the knowledge of small scale "in house" cheese making to you.  

This is what we will be making: Fresh Butter, cultured buttermilk, sour cream, cream cheese, cottage cheese, herbed cheese logs, feta, ricotta, yogurt, labaneh (a spreadable yogurt cheese), 30-minute mozzarella AND the step-by-step process for making aged cheeses such as Cheddar, Colby Jack, Parmesan, Pepper Jack, Gouda and Brie, as well as artisan cheeses....  
I am already packed and ready to go!

Cookbook Give Away

If you ever watch Alton Brown on the Food Network, then you are familiar with Shirley O Corriher. Corriher, as well as, Harold McGee and Herme This, have been writing about food science years before anyone watched "Good Eat's"(yes, I love the show) or "America's Test Kitchen".

A few days ago, I received two copies of Shirley O Corriher's new Cookbook;  BakeWise: The Hows and Whys of Successful Baking with Over 200 Magnificent Recipes.

This month, I will have a drawing for a chance to win my second copy of "BakeWise".  Everyone who signs up to receive my blog (the sign up is to the right, directly under my profile), will be entered in the drawing to win this new cookbook.  If you sign up, or are already receiving my blog, just send me a quick email with your name and email address and I will contact you when the winner has been chosen. The cookbook contest begins today, October 22, 2008 and will end October 31, 2008.  Feel free to pass this opportunity on to your friends and family who enjoy food!   My email address is located in the "about me" section of this blog. Good Luck!  I am off to make cheese....


Chef Deb

Monday, October 20, 2008

Anasazi Bean and Pumpkin Stew

The Anasazi bean was a perfect choice for this weeks LFM sample.  These beans cook more quickly then traditional beans and the ones I made, are grown in Colorado. I paired the beans with pumpkin, some smoked sweet paprika, toasted cumin seeds, green chiles and finished it all with a good handful of cilantro.  I was afraid it was going to be a hard sell this time..but with a little persuasion, we soon heard the familiar, "oh's,  ah's and mmm's " of acceptance.  I live for those three sounds!

DSC00402

Anasazi Bean and Pumpkin Stew

1 Cup pinto beans, soaked overnight and drained (*canned beans may be used instead)
1 lb tomatoes, fresh or canned, peeled, seeded, and diced, juice reserved
1 tsp cumin seeds
1 tsp dried oregano
1/4 tsp Cinnamon
2 pinches of ground cloves
3 Tbl Olive oil
1 large onion, cut into a medium dice
4 cloves garlic, finely chopped
1 T paprika (Sweet or picante, Smoked Paprika from Savory Spice Shop in Boulder)
3-4 C bean broth or vegetable stock, ( you may add extra water at the end, if more liquid is needed)
3 C pumpkin or winter squash, peeled and cut into 1 inch cubes
2 jalapenos, seeded and finely chopped
Salt and pepper to taste
Squeeze of lemon or lime
Cilantro, chopped, for garnish 

Cook the beans in water for about 1.5 hrs or until beans are tender (do not add salt to beans until they have been cooked!) Drain and reserve the cooking liquid.
Warm a small heavy skillet and toast the cumin seeds until their fragrance emerges; then add the oregano, stir for 5 seconds, and quickly transfer the spices to a plate or bowl so they don't burn. Combine them with the cinnamon and the cloves, and grind to a powder in an electric spice mill, or just leave them whole.
Heat a 4-quart soup pot over medium heat, add olive oil and sauté the onions and jalapenos for 5-7 minute; Add the garlic, the spices, the paprika, and 1 t salt. Next add the tomatoes and cook 5 minutes. Then add the pumpkin or winter squash along with stock. Cook for 20 minutes, then add beans and cook for 5 more minutes. Taste and adjust seasonings w/ salt and pepper. Add a squeeze of lemon or lime to brighten up the stew. Garnish with fresh cilantro.

*Canned beans may be used instead of dried

Sunday, October 19, 2008

Butternut Squash and Fennel Gratin, Cooking with ‘Chef Deb’

This is a reprint of the recipe that ran in this Wednesday's , Times-Call . To tell the truth, I was more excited about this article then I thought I would be. I actually bought several papers and showed it to the cashier. That's me! She simply smiled and said, "that will be $1.50"....

For those of you who missed the article, click on the the title of this post.

Even more exciting, were all the people who came to the market for the first time and stopped by to say "hi". I was happy to chat with many of you, I apologize for being so busy. This was a very special Saturday and there was a lot going on. If I did not have a chance to do so, I would like to say:

Welcome to the Longmont Farmer's Market!

I hope you make going to the market a regular Saturday tradition. We have so much to offer in terms of local produce and products and it is a positive way to keep our local economy strong.

I love Gratins.
These are not even remotely related to the American versions of "au gratins", which are oily and cheese laden.

In this very French dish, the vegetables are baked in a small amount of cream and/or half and half, and sprinkled with a few tablespoons of cheese, or buttered bread crumbs. This basic recipe works with any vegetable or combination of vegetables you can think of: sweet potatoes, kale, potatoes, leeks, cauliflower, cabbage, etc., etc.. Yes, you can make it lower fat by substituting some broth for a bit of the cream. But why would you?

When making Gratin, always add boiling liquids to your vegetable before baking it. The hot liquid speeds up the cooking time and creates a creamier dish.

Try this recipe at home, and play with the ingrediants.

I served this dish at the Farmer's Market Community Lunch, and everyone love it (of course, it was described as the 'orange stuff ').


Gratin

This is what it looks like before it is baked..it was eaten before I could take a photo of the "after".

                      Butternut Squash and Fennel Gratin
Serves:
4 as a Main course
6-8 as a side dish

2-2 1/2 pounds Butternut Squash, peeled, seeded, sliced thinly
3 Tablespoons extra virgin olive oil
2 small bulbs fennel, cored, stalks removed, thinly sliced (save the fennel fronds)
1 small sweet onion, thinly sliced
1 clove garlic
1 pinch of fresh grated nutmeg
1/2-cup half and half
1/2-cup heavy cream
3-4 ounces grated hard local cheese (or gruyere, parmesan, pecorino)
Sea or kosher salt
Fresh Ground pepper

Preheat the oven to 350° Butter or oil a 9 x 13 inch casserole pan.

Place a medium sized skillet over medium-low heat, next add olive oil and sweat* the fennel and onions until both are translucent, about 10 minutes. Add garlic and cook for 2 more minutes. Next add nutmeg, cream, half and half, 2 teaspoons sea salt and bring to a boil. Remove from the heat.

Chop a few tablespoons of the fennel fronds.

Place half of butternut squash in the bottom of the casserole; top with half the fennel/onion mixture, some fennel fronds, and lightly salt and pepper. Repeat, ending with all the cream and fronds. Salt and pepper again. The cream will not cover all the squash, but it will bubble up while it cooks.

Cover casserole with foil and place in the middle of the oven for 30 minutes. Remove the foil, top with grated cheese and bake for an additional 15 minutes. Allow to cool for 10 minutes, before eating. Enjoy
*Meaning: cook at a lower heat and there should be no color or caramelization on your vegetables, you just want them to release their natural juices

Thanks for stopping by!

Chef Deb


The First, Longmont Farmer's Market Community Lunch

We ARE a Community...
I am still very moved by this Saturday's turnout of volunteers.


Thank you 2

In the past, I would always invite the vendors to stop by the stand to sample each weeks recipes. But it turned out many were unable to do so because they were either too busy or they were the only ones attending to their stands. As a food pusher, this was always disappointing to me, as I was here for everyone; Longmont shoppers and the farmers. 

Then I had this idea, but I needed a bunch of help..

I had hoped I could coax a few people to give up some of their Saturday to help deliver food to the farmer's and vendors, many of which donate the food I sample out each week.  

The response was better then I had hoped.  Cindy Torres, the market manager, is always talking to me about creating value, and community at the LFM.  Well, this Saturday, fourteen volunteers took a simple act of delivering food and turned it into the act of a sharing community. I can rate it right up there with some of my best culinary moments. It was a joy working beside each of you and I want to personally and publicly, say...

Thank you, to:
Susan S.
Sharon E.
Jenn and Dave M.
Julie B and Scott S.
Gunther and Adrienne S.
Marcy and Parker N.
Lorraine Cope "the meat lady"
Lori L. 
Chris W.
Danielle A. 

A special Thanks to:
*The Culinary School of the Rockies donated boxes of vegetables, pears and Culinary Instructor  Marilyn Kakudo made the Gingerbread Pear Cake. www.culinaryschoolrockies.com

*My friend and Chocolatier, Robin Autorino, of Robin Chocolates provide the volunteers a little gift of chocolates. Robin lives in Longmont and she is starting to really see her chocolate business take off. Visit her @  www.robinChocolates.com

* Fred at Miller Farms- for loading my little car with produce to pull this whole thing off.
http://www.millerfarms.net

*Ewell at Pachamama Farms, for letting me grab more as we began to run out.
http://www.pachamamafarm.com

* Honeyacre Beef for helping supply all those Beef Short Ribs. www.honeyacre.com
  
* Full Circle Farms (a.k.a. Rocky Mountain Pumpkin Ranch)- The stand who gave us emergency greens!  http://www.rockymtnpumpkinranch.com

Thank you for making the Longmont Farmer's Market Community Lunch a success!
You made the vendors very happy and I am one very proud Chef!

All my best,
Chef Deb


DSC00405

DSC00417

DSC00408

DSC00415

Adrienne

DSC00425

DSC00409

Thank you, Thank you, Thank you!

Sunday, October 12, 2008

Grilled Squash w/a Balsamic Glaze

Last week, Huck (of Huck's Kettle Corn) shared his recipe for using "pie pumpkins". Huck likes to slice small pumpkins and sautes them in a hot pan. He simply finishes it with a little drizzle of balsamic vinegar, honey, salt and pepper. I always enjoy swapping ideas with people, so Thanks Huck!

You KNOW I am going to "Chef" with it..........

DSC00365

Squash: Ambercup, Buttercup, Delicata (on the grill), Sweet Dumpling. Pumpkins: Baby boo (white), Pie pumpkin (orange).

DSC00364

The squash are sliced, seeded and tossed with olive oil and sprinkled liberally with salt and fresh ground pepper. Use a gas or charcoal grill, or a heavy grill pan will also work.

DSC00358

Simmer balsamic vinegar until reduced by half and the syrup should coat a spoon.

DSC00367

I used a variety of squash and pumpkins just to see which were the most flavorful. 
I decided to leave the skins on, so I scrubbed, seeded and sliced each one. Here are my findings: 
*Baby boo (white) pumpkin: a bit hard to slice, grilled nicely, had a mild flavor, the skin was a bit chewy.
* Ambercup (orange) and Buttercup (green): easier to slice, grilled nicely, firm flesh and the skins were tender when grilled.  Both of these were my favorites.
*Delicata- I sliced these first then, scooped out the seeds in the individual circles. This squash has a mild sweet potato taste, grills nicely, firm flesh and the skin is tender. These were my daughter's favorite, she ate them like potato chips.
*Pie Pumpkin-I cut these in wedges, toasted the seeds too!  The pumpkin is a bit tricky on the fist cut, the rest are easier. This variety grills nicely, but it cooks faster (softer) then the others, the flesh is soft and mild, and the skin is very tender.

All the varieties tend to caramelize easily so be careful not to let them burn. Personally, I like dark grill marks on my veggies, but I will leave that call up to you.

                             Grilled Squash w/a Balsamic Glaze
2-3 lbs pumpkins or squash
3 or 4 tablespoons Extra Virgin Olive oil
Sea or Kosher Salt
fresh ground pepper

1/2 -3/4 cup Balsamic vinegar
1-2 Tablespoons honey, agave nectar, real maple syrup

Crumbled Haystack goat cheese, or a nice sheep feta.

Heat grill to high.
Scrub, seed, and slice squash. Place squash in a large bowl and toss with olive oil, salt and pepper. Lower heat on grill to medium and place squash on grill rack. Lower the lid on the grill and wait 5 minutes. Check the veggies, some will cook faster then others, depending on how your grill works. Turn the squash when desired color is reached. The squash should still be "al dente" or slightly firm. Remove squash and toss the veggies in the olive oil still left in the big bowl, adding more oil if needed. Salt and pepper to taste.

While veggies are grilling, add balsamic vinegar to a small sauce pan, and simmer on medium heat until liquid is reduced by half. When sauce has thickened, remove it from the heat and add honey to taste. reserve for plating.

To Plate: arrange grilled squash on plates or a platter, drizzle with balsamic-honey glaze, sprinkle with crumbled goat cheese, and fresh pepper.  I serve this with a nice green salad, or on a bed of sauteed greens.

Enjoy,

Chef Deb T

Saturday, October 11, 2008

Opal Lee's (Meemoe) Apple Cake w/Real Scotch Butterscotch Sauce

DSC00346


My friend (and fellow chef) Dacia, comes from a long line of good southern cooks. Her grandmother, Opal Lee (Meemoe to her family), was famous for her cakes and it is said she made a fresh cake everyday.  In my book, this feat alone makes her a world class cake expert.
This week, I asked Dacia for one of Meemoe's best Apple Cake recipes, and boy did she come through!  I was given permission to print this recipe and I am thrilled to share it with you.  This cake has love baked into every bite!

I would call this an "old fashioned Apple Cake", and you may be inclined to add any number of the options listed in the recipe.  Please note, this makes several cakes, you may want to cut the recipe in half or make the full recipe and freeze the extra cakes.  If you freeze the cake, triple wrap in plastic wrap and store up to 2 months.

Thanks Meemoe (and Dacia)! 

   Opal Lee's (Meemoe) Apple Cake w/Real Scotch Butterscotch

This recipe makes a large amount of batter, use a large bowl.

Makes: one 13x9 and one 9 inch round cake or a loaf pan

3 sticks butter, (1 1/2 cups)
3 cups sugar
6 eggs, room temp
4 1/2 cups all purpose flour
1-teaspoon salt
1-teaspoon cinnamon
1-teaspoon nutmeg
1-teaspoon allspice
4 1/2 cups sliced apples, peeled or unpeeled
4 teaspoons baking soda
2 cups raisins or dates (optional, I did not use any at the FM)
2 teaspoons vanilla
1 cup nuts, chopped or ground

Preheat oven: 350 degrees

In a medium bowl combine: flour, salt, cinnamon, nutmeg, and allspice. Set aside.

In another bowl, prepare apples and toss with baking soda. Set aside.

Cream butter and sugar in a mixer until light and fluffy. Add eggs, one at a time, alternating with flour mixture. When eggs and flour are completely incorporated add vanilla, then apples, raisin/dates (optional), nuts (optional).

Butter and flour pans listed above and pour batter into each one, filling 1/2 to 3/4 full. Bake until toothpick inserted in the middle of cake comes out clean.
*This cake freezes well.
Bake:
**13x 9 pan: 40-50 minutes
**9-inch round or square pan; 35-45 minutes
**Loaf pan: 40-50 minutes
**Muffins: Begin checking at 20-25 minutes

To serve:
*Meemoe would spread salted butter over the hot cake and serve it warm. or
*Dust with powdered sugar, or
* When hot, drizzle with Real Scotch Butterscotch sauce, serve extra on the side.

Real Scotch Butterscotch Sauce

1 1/4 cup brown sugar, packed
2 Tablespoons unsalted butter
1/3 cup heavy cream ( you may use 1/2 & 1/2 but the sauce will be thin)
3 Tablespoons corn syrup, agave nectar or honey
1 pinch of sea salt
3 Tablespoons Scotch
2 teaspoons vanilla extract

In a medium saucepan, combine sugar, butter, cream, corn syrup and salt. Bring mixture to a boil, and stir constantly, until mixture thickens,(as the sauce cooks, the boiling mixture will develop larger "bubbles" as the liquid evaporates. When this happens check to see if the sauce will coat the back of the spoon, if it does, then you are ready for the next step).

When caramel sauce coats the back of the spoon, stir in Scotch and vanilla. Remove sauce from heat and allow to cool. Have a few spoons ready.. it's THAT good. Sauce will last for 2 weeks in refrigerator. Warm gently before serving.

Enjoy, 
Chef Deb


Friday, October 10, 2008

Three Potato Chowder

DSC00342

This is the perfect cold weather comfort soup. Please feel free to adjust this recipe to suit your diet.
*Bacon can be omitted and crispy shallots may be substituted to add depth of flavor.
*A Vegan version can be made by omitting milk and substituting unsweetened soy, rice, or almond milk.
*For thicker dairy free soup, puree half.
*Add 2 cups chopped kale for a heartier soup.

Three Potato Chowder

8 Strips Bacon (turkey bacon, or Smart Bacon), chopped
2 small Colorado sweet onions, diced
3 stalks celery, diced
1 small jalapeno, or roasted green chile
7 medium Colorado Gold potatoes
7 medium Colorado Red skin Potatoes
1 large sweet potato or yam
1 Bouquet Garni (BG)= 1 bay leaf, 6 stems parsley, 4 stems thyme, 6 whole peppercorns
2 quarts milk (2% is okay)
Kosher or sea salt
Fresh ground pepper
Garnish: Chopped chives, grated local cheese,

In a large stockpot over medium heat, sauté bacon (or turkey bacon, smart bacon) until crisp. Remove bacon and all but a few tablespoons of fat. Chop bacon and set aside.

Sauté onions, celery, and jalapeno until the vegetables are translucent. Add all the potatoes, BG and milk. Bring soup to a boil, then lower the heat and simmer for 20-25 minutes (You may need to skim the foam off the top, this is normal).

Once potatoes are tender, add 2 teaspoons salt, fresh ground pepper then taste and adjust seasonings. Remove the BG.

To Plate: Ladle soup into warm bowls, top with chopped bacon/smart bacon, cheese, and chives. Season with fresh pepper and serve with crusty bread.

Tuesday, October 7, 2008

Squash Varieties

For anyone interested in identifying squash varieties and finding out the subtleties of each one, please click on the title of this post.


DSC00327


Look at all those gorgeous squash! Incredible colors! I was able to get a great deal on all of these, so my daughters and I went crazy. What you don't see is the huge box of tiny pumpkins on the floor off to the right.

DSC00328

Recipe will follow soon. I just wanted to get these photos up and motivate you to begin thinking about winter squash...

See you at the Market!

Chef Deb

Saturday, October 4, 2008

Colorado Onion Sage Soup

DSC00321

DSC00322

Colorado Onion Sage Soup

Serves 8: if you’re sharing

4 Tablespoons unsalted butter, or extra olive oil
5-6 sprigs fresh sage, 30-35 leaves, save 16 for garnish
5 large cloves of garlic, peeled and minced
8 Large Colorado sweet onions, peeled, and thinly sliced, pole to pole (slice root to stem, and not along the equator, which will give you half circles and we don’t want those).
1 cup Sauvignon Blanc*
* (Or omit this step and add a squeeze of lemon or balsamic vinegar at the end)
1 bay leave
6 whole peppercorns
2 quarts good quality beef, chicken or vegetable stock
Kosher of Sea Salt
Fresh Ground Black pepper
8 thick slices of stale bread, toasted
5-6 ounces firm Colorado cheese (Windsor, Haystack, or Mouco)

Over medium heat, add butter or olive oil to a 5 quart, heavy bottom stockpot (it should have a lid for later use). When butter begins to bubble, add 30 or more sage leaves to the pot and stir gently and fry sage for at least 2 minutes. Remove 16 sage leaves and drain them on a paper towel, reserve for garnish.

Next add minced garlic and sauté for 2 minutes, add all of your onions, about 2 teaspoons of kosher salt (if you HAVE to use regular salt, decrease to 1 teaspoon) and several good grinds of fresh pepper. Give the whole thing a good stir, making sure all the onions are coated with butter/oil.

Turn the heat to LOW and cover the pot with a lid. These onions will need to caramelize very slowly, and it should take about 45-60 minutes. Stir the onions every 10-15 minutes. Once the onions begin to release liquid, take off the lid and turn the heat up to medium, and wait for the liquid to evaporate. This step takes a while. If you caramelize your onions any faster, you are not going to have the depth of flavor we need. The term “low and slow” means LOW AND SLOW… If you find the bottom of pan starts to “color”, this is a good sign, just keep stirring, You may add a few tablespoons of water if you are worried.

When your onions become a deep rich color (think cigar), turn your heat to medium, add your wine and reduce the wine volume by one half (or cook until you no longer smell the alcohol). Next, add your stock, peppercorns, and bay leaf and simmer for 15 minutes. Taste, add additional salt and pepper, and the squeeze of lemon juice or balsamic vinegar if you did not use the wine.

To Serve: Preheat oven boiler**. Using oven safe bowls or mugs; ladle soup into mugs, top with toasted slice bread and a few tablespoons of your favorite cheese. Place soup under broiler until cheese is melted and bubbly. Remove from broiler and top with each bowl with two fried sage leaves, notice how mild they taste once they are fried.

** Skip putting bowls under the broiler, by simply placing toast topped w/cheese, on a sheet pan, in a hot oven or broiler. Melt cheese and place toast over soup, garnish as directed.
***Soup freezes well.

Thursday, October 2, 2008

Simple Food: Roasted Tomato Tartine w/Tomato Vinaigrette


If you forced me to define my style of cooking, I would use one word: Simple.

The beauty of simple food and simple ingredients are you don't have to have years of culinary experience to make something special. All you need to know are a few basic techniques, and how to buy quality, local food.  I won't get into buying organic or not, as the choice is really up to you. My goal is to provide you with recipes and ideas that will fit your life, and bring you back to real food. Local, Seasonal, Simple.

I still have more tomatoes then I know what to do with this year, so here is ANOTHER tomato recipe.  It is a tartine.  Tartine ( Tar. TEEN) is french for an open faced sandwich.   This one is made with a good quality whole grain bread, sliced thickly and toasted.

Roasted Tomato Tartine w/ Tomato Vinaigrette
Serves 4: unless someone eats all your roasted tomatoes

2-3 lbs of mixed variety ripe tomatoes (I like to use small and medium sizes)
Extra virgin olive oil
Kosher Salt
Fresh Ground pepper
Fresh, good quality bread

1 Cup Fresh picked salad greens
2 Tbl Fresh herbs, chopped (your choice; thyme. chervil, parsley, chives, etc)
1-2 teaspoons Red wine vinegar
1 teaspoon Dijon mustard
Tomato water (saved from the recipe above)
2 teaspoons extra virgin olive oil
Sea salt
Fresh Ground pepper

Preheat oven to 350°

Core tomatoes and cut in half if small, or quarter if medium. Gently, squeeze out tomato pulp and seeds over a bowl fitted with a fine mess strainer, discard the seeds (or save them in the freezer to add to your stock). What you now have in the bowl is called tomato water. Taste it..now set is aside for later use.

Place tomatoes cut side up on a sheet pan, drizzle with a few tablespoons of olive oil, salt and pepper. Place in oven for 40-45 minutes**. Once they appear slightly toasty on the edges, remove them from the oven and allow the tomatoes to cool. Resist snacking on ALL of them!

While tomatoes are roasting, whisk the tomato water, Dijon mustard, 1 teaspoon red wine vinegar, and a few pinches of salt together in a small bowl. Taste. You can add more vinegar or salt if needed, but it should taste like a fresh tomato. Whisk in a few tablespoons of olive oil and a bit of fresh ground pepper. The vinaigrette will separate. Set aside. You will have more then you need, so save it in the refrigerator for another use, or sip it as you make dinner.

To Serve: Toss the greens and the herbs with a few teaspoons of Tomato vinaigrette; Toast or grill bread, top with roasted tomatoes, and finish with dressed salad greens, Drizzle an additional teaspoon of vinaigrette on each Tartine, and add few grinds of fresh pepper. Serve with a nice wedge of your favorite MouCo cheese on the side. Enjoy, Enjoy, Enjoy!

**If your oven is already in use, double or triple the tomatoes and roast enough to use all week. Just reserve 1/2-cup tomato water, for this recipe and save the rest in the refrigerator or freezer.

Monday, September 29, 2008

Munson's Farm Stand: Pumpkin Bisque


You cannot mistake the signs of Autumn and if you happen to drive by 75Th and Valmont, in Boulder, Colorado, stop in and say hi to the Munsons. Their pumpkins are gorgeous! 

Pumpkins and winter squash are beginning to show up everywhere, and I am  already receiving several requests for fall pumpkin and squash ideas. I promise to keep everyone well stocked with recipes, as long as you do your part and head to the farmer's markets  and farm stands to stock up.

 Winter squash are hearty vegetables and according to Bob Munson, at Munson Sweet Corn,  if stored properly, we can have squash all thru April or May. Properly stored means; a  cool dry place, with no extreme temperatures.  A garage is not safe unless it is heated and refrigerators are not the best place either. Basements are a good choice if you have one, and the boxes need to be on a shelf, off the ground to keep from attracting unwanted furry guests.

Well, let's think about this for a moment. Winter squash all season with no running to the grocery store until mid spring? You bet! Stocking up now supports our local farmers, lowers our carbon foot print, and it's economical too. I see this as a culinary challenge and I am up for the experiment! I plan to buy enough winter squash to last until mid-April, and I will offer one new recipe each week using various varieties of squash.  
Three good things can happen. One, we will test the shelf life of squash and become experts on "squash sustainability". Two, we will be pushed to try creative and interesting ways to use what we have.  Three,  you will spend a little less time running to the supermarket to buy ingredients because you bought and stored your vegetables already this fall! Sounds Green to me.  I see this as a win-win community project. Anyone willing to try? Appetizers to dessert. All simple ingredients with exceptional flavor.

Recipe one: a good faith recipe.
I made this Pumpkin/Squash Bisque recipe for the Longmont Farmer's Market and it was a hit. Use your favorite variety of squash.  Please note, I do not add apples, ginger, sugar, or too many savory spices to this soup. Primarily for one reason, I want you to taste the simple beauty of squash/pumpkin. Too many times, exceptional produce is lost with all the "extra" flavorings of the moment.  It is time we relearn how to taste real food.  This is the perfect beginning. As always,

I will see you at the market.

Chef Deb T.


Pumpkin Bisque
Makes a pot

4 Lbs. pumpkin/squash, cut in half and seeded (save seeds for toasting, yes winter squash seeds work too!)
1 Tbl Olive oil
2 Tbl butter
1/2 onion chopped
2 gloves garlic
1 BG (Bouquet Garni= 1 Bay leaf, 4 stems thyme, 2 Stems of Parsley w/o leaves, & 6 peppercorns) Wrapped in cheesecloth, (I use a large tea strainer that closes) or throw it all in the pot and fish is out later.
4-5 cups veggie stock or water
Heavy Cream (optional, but adds richness) 1/2 cup is a good start
Lemon juice
Salt and pepper to taste
Good Fruity Olive oil, or walnut oil (optional)

Toasted or grilled croutons

Preheat oven to 350 degrees

Place pumpkin/squash face down on a sheet pan (you can put down parchment or foil to make cleaning easier), add a 1/2-cup of water and bake until tender. Begin checking pumpkin after 20 minutes of baking. The pumpkin is ready when you can insert the tip of a paring knife and it slides in and removes easily. Remove sheet pan from oven and cool. Once cool enough to handle, scoop out flesh and reserve for soup, this can be done several days before soup is made.

In a soup pot, add butter and sauté onions for 5 minutes, and then add garlic, BG, Stock (I use water when I want the pure taste of my squash to come through) and pumpkin. Simmer for 10-15 minutes. Remove BG. Puree soup in batches in Blender/ Vitamix.

Return soup to pot, add more water if soup is too thick, and cream if desired, and add 2 tsp kosher salt. Taste. Adjust seasoning; most likely it will need a squeeze of lemon juice (a dash of dry sherry is nice) and more salt and pepper.
Keep warm until ready to serve.

To Serve: Ladle soup into warm bowls and garnish with a few toasted croutons or roasted pumpkins/squash seeds saved from these pumpkins! Finish with a drizzle of olive oil and with salt and pepper. Enjoy.

**This soup freezes well without the cream, which can be added as it is being reheated.

Thursday, September 25, 2008

Morton's Orchards: A Good Beginning and Pink Peppercorn Peach Jam


AND Lavender Peach Jam too!
I have been agonizing for weeks on what I would use for my very first blog. Content is not an issue. Honestly, if you speak to me for more then five seconds you will quickly realize I am never short of ideas. In fact, my mind has always been in a huge hurry to know more, see more, store more, and to offer more. I really just needed a push and I think the end of one season and the beginning of another is just the nudge I needed.

Last week at our Farmer's Market, I was asked to do a few recipes involving peaches and plums. I was given a case of really gorgeous Palisade, Colorado Peaches (from Morton's Orchard) and told to have fun. Let me say this again...I was given a CASE! Swoon!! After I put the box in my front seat, and seat belted it in, I took all the smooth roads home. One cannot be too careful, this was a CASE after all.

I had visions of cakes, chutneys, salsa, pies and even butters. But in the end, I decided to do four, low sugar no pectin peach jams. I took Pink Peppercorn Peach and Vanilla Bean Peach jam to the market this week and as usual we ran out. I hope you will try these easy small batch recipes.

See you at the Market.

Chef Deb


                                   Peach Jam Recipes
               Small batch, no pectin Spoon Jams

When buying peaches at the peak of their season consider buying more and storing them in the freezer to make simple jams during the colder months. These recipes must be stored in the refrigerator and should last for 2-3 months.
Peel peaches by cutting an “x” at the bottom of each, put into a pot of boiling water for 30-45 seconds, remove from hot water and put into a bowl of ice water. Peels will slip off easily. Slice and chop peaches and proceed with recipe or freeze them in plastic freezer bags.

The Fruit to sugar ratio is 3:1. Recipes can be doubled, tripled or halved.

                                Vanilla Bean Peach Spoon Jam
Yield: Three  8 oz jars

6 cups fresh peaches, peeled and cut into chunks
2 cups sugar
1/2-teaspoon butter
1 Vanilla bean, cut in half lengthwise and seeds scrape out
1 Tablespoon lemon juice

Layer peaches and sugar in a bowl, ending with sugar, cover and let rest for several hours or overnight.
Put peach and sugar mixture into a medium heavy bottom pot, add butter. Bring the peaches to a boil and continue boiling up to 30-35 minutes. Keep an eye on it and stir it on occasion. Add Lemon juice, whole vanilla bean and its seeds, and cook for 5 more minutes. Begin checking for “gel”, by taking a spoonful and putting a few drops onto a cool plate, wait 1 minute and touch it to see if you like the consistency. When ready pour into clean warm jars, wipe the lid, and seal tightly. Let cool to room temperature and refrigerator for 2-3 months.

Variations:
*
Vanilla Bourbon Peach Jam: add 1 Tablespoon Bourbon with the vanilla and lemon juice. Cook for an additional 3-5 minutes.

*
Pink (or Green) Peppercorn Jam: Proceed as above; substitute 1 teaspoon crushed Pink or Green Peppercorns for Vanilla bean.

*
Lavender peach Jam: Steep 1 Tablespoons dried lavender buds in 1/4 cup hot water for 15 minutes, strain out flowers and keep the lavender water. Pour lavender water into pot at the beginning of the cooking process. Omit vanilla bean, but add lemon juice. When pouring the jam into jars, sprinkle a few lavender buds on top. (Always start out with less lavender as the flavor can be overpowering. The flavor will concentrate as the jam reduces).